
In case you missed the Prologue...
In Asheron's Call, there are no horses to ride, or dragons to mount, instead your character traverses a huge game world by use of magical portals. These swirling circles are mesmerizing in all their 16-bit glory, and I decided to make an attempt at capturing that beauty as a plate that can be used everyday.
T he process took an entire year from its' start, with lots of downtime to accommodate running all of the other (and let's face it, more principle) parts of Mountain Mudworks.
he process took an entire year from its' start, with lots of downtime to accommodate running all of the other (and let's face it, more principle) parts of Mountain Mudworks. Taking photos along the way was its' own challenge, and everything captured that's worth sharing will be included in this series.
Shaping Up
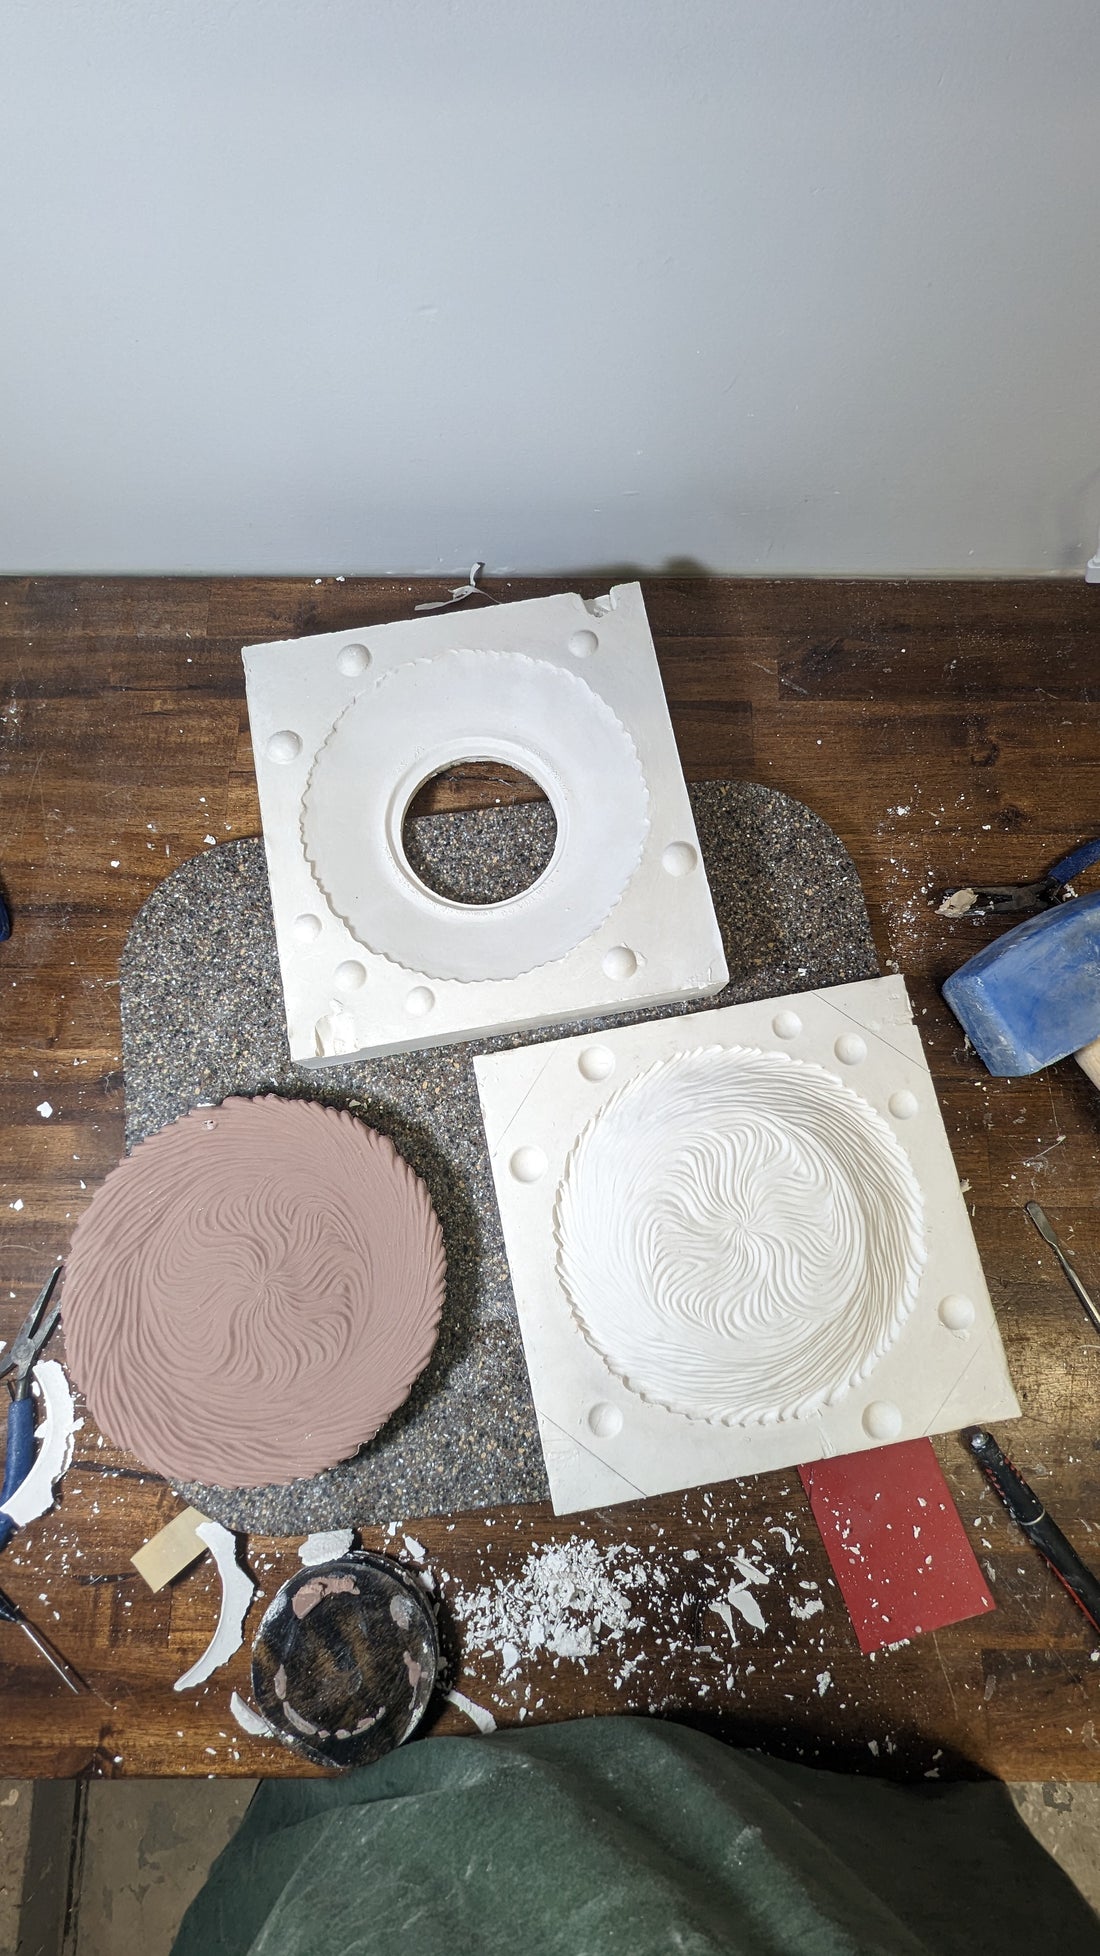
It was a pretty simple idea: a 'swirly portal' textured circle with slightly raised edges and a foot. Knowing that simple objects are deceptively difficult to get right, I decided to use an existing plate as a foundation. A thin white side-plate was the perfect size, and helped keep my round shape true, and the overall plate rigid while I worked on all the little ridges of portal space.
I began by arranging coils of a wax-based clay into the general shape(s) I was aiming for. In the game, portals are a moving multi-layered affair, brightly colored spirals with each level spinning counter to the last. Since I couldn't imagine how to even begin to recreate that in clay, I settled for a center section that spirals out in one direction from the center, and a rim of spiraling arms or ridges that 'spin' counter to it.
 Getting it right
Once I had a basic shape outlined in clay, it became a task of joining each seam as I fine-tuned the shape of each ridge and valley. At times, this process is extremely satisfying. At others, it can be infuriatingly tedious. Sometimes, the best thing to do is to step away and give your cramped fingers and overtaxed eyes a break. After several starts and stops and many hours of refinements, I was ready for the next step:
To refine it some more!
I jest, but it really did feel that way sometimes! If you are sculpting with mold making and reproduction as an objective, there are several extra things to keep in mind. Add seamlines, minute undercuts, and clay shrinkage to the mental constraints, i.e. "Is this good enough to reproduce?", and it is easy to justify spending 'just one more hour' on touchups.
Pouring a plaster mold
Eventually though, it really is time to move on to the next step, so I secure the model to a level surface and create a containment field. Here, I'm using 'cottle boards' made simply by attaching an additional layer to equal sized pieces of plywood and arranging them in a secure size-changing rectangle using hand clamps.
After adjusting the simple wooden mold and securing the cottle boards to the work surface, making the mold watertight prepares it to fill the void around the bottom half of the plate. In this case, I'm using alginate to create a very simple 'one dimensional' parting line.
Alginate is a uniquely useful mold making material. Typically used in life casting, it mixes into a pourable liquid, but sets up as a semi-rigid solid in about 10 minutes. Using its' self-leveling property to create a roughly even parting line in one quick step is an absolute time saver!
With a batch of carefully mixed plaster solidified over the top side of the plate, it's now easier to make improvements to the underside without smudging all the hard-earned detail on its' face.
Back to: Getting it right
I worked on the sides, from the lip of the plate to its' foot, until it was smooth and level and flat. Next, adding the script was super intimidating, but using text printed in the correct shape made it so much easier! Once I was satisfied with the look and feel of the back side and its' text, I worked on the plate's foot.
A foot is, in this case, essentially a raised circle and it will allow for glaze firing without needing to prop each piece on specially designed 'stilts'. It needs to be level and flat, or every plate will be wobbly! If it is too short of a foot, glaze may run and fuse with the kiln furniture.
With all of that figured out, the last addition is a squat cylinder of clay (I used a wooden disc as a base form) centered on the flat 'foot'. This forms a well on the plaster mold that, when emptied at the proper time, will help form a consistently wide inner ring to the foot.
After adding 'registry keys' to the existing plaster and carefully brushing everything with a release agent (petroleum jelly), the second side of our first iteration is ready to smother in plaster!
Back to: Pouring a Plaster mold
Making side two is a lot like making side one! A containment field is built around the model. This time, the existing plaster acts as a size guide and helps stabilize the cottle boards as I seal up all the seams and make it watertight.
This side of the mold is a little different in plaster coverage too: the well should NOT be covered. If covered in plaster, we might have a two-part mold with a Portal Plate shaped cavity inside, but without a way to fill it with slip!
One batch of carefully mixed plaster later, and we have a 'complete' two-part mold!
Cool. All done. That was Fast...
Not by half! Mold making is a long, iterative process. I want to provide you with an overview of the whole process without getting lost in the weeds (as I'm wont to do!) That said, this mold technically isn't even finished yet!
Next time, I'll go over the final cleaning, detailing, and curing, using the new mold, and color testing! Not to mention preparing for iteration number two, and more!

---
Tell me more about this plaster you're using!
The plaster we use in our pottery casting is USG No.1 Pottery Plaster. This plaster is similar to the much more ubiquitous 'plaster of Paris' but differs in a few key ways. for one, the ideal mixing ratio of pottery plaster is such that once mixed and activated, it pours freely, surrounding the model with minimal air entrapment. Another important difference is in the strength of the plaster and its ability to hold detail on its surface; pottery plaster is formulated to be much stronger and harder wearing. Learn more here: